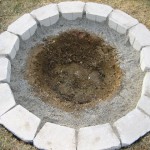
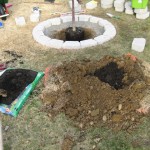
Plant a Tree and Build a Retaining Wall Tree Ring In One Day
2020-09-12 Updated
2010-04-15 Initial Post
Wow! It's been over ten years since I posted this. How time has flew by. I had my first child close to two years after I originally posted this (born 2012-03-15) and then had another one in 2017. I was looking over this post because I will be planting a Japanese maple (I've moved to another house since this post).
I wasn't able to find any instructions on how to plant a tree and build a retaining wall tree ring at the same time. So here are my notes on how to do that. I did a lot of planning and research and got all the tools necessary, so everything pretty much went as expected. I rented a truck from Home Depot to transport everything. I did all the design and work on my own. If you plan to do this, don't be cheap--get all the necessary tools and supplies to do the job the right way. There are way too many people who just throw some blocks directly on dirt and call it a day.
I got all my supplies and the tree at Home Depot. The tree cost $99 and was listed as 9.0 gallon. A week later, I saw the same tree (it might have had a different scientific name, but it looked exactly the same), which was a bit taller and listed as 6.5 gallon, at Lowe's for $49. It doesn't make any sense to me, but trees are sold by gallon size (and it's not the size of the container so I'm not even sure what the gallon is in reference to). Even if the trees themselves are the same size, the one with the larger gallon size will cost more.
Tree Ring
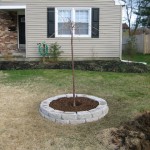
5 ft outer diameter x 2 courses.
I used gray Pavestone Anchor Windsor Stone 11 5/8” W x 7” D x 4” H. This project requires 16 stones per course and 12 sq ft of course leveling sand (two standard .5 cu ft bags). Lowe's has similar blocks but the front face of the Lowe's blocks looks very cheap compared to the Home Depot blocks--go take a look at them and you'll see what I mean.
The ring is 60 in outer diameter, 46 in inner diameter
15 ½ ft outer circumference, 12 ft inner circumference
Tree
I used a 6 ft Pink Weeping Cherry (prunus subhirtella pendula) from a 10 gal container.
Total Time
7 hours for a single person. Project was completed on March 27, 2010.
Supplies
• Tape Measure
• Yardstick
• Small stakes or any small pieces of wood, metal, or plastic that can be used to temporarily mark spots in the ground.
• Marking spray paint
• Torpedo level
• Regular-sized level
• Wheelbarrow
• Large plastic tarp or thick plastic drop cloth
• Shovel, round point
• Shovel, square point
• Half-moon edger
• Safety goggles
• 2 lb drilling hammer
• Rubber mallet
• 4” Masonry Chisel
• 5 ft of 2 x 4 wood (for leveling)
• Hand tamper (10 in)
• Rake, leaf
• Rake, bow
• Weed block fabric (4 ft x 120 ft roll of Easy Gardner Weed Block Pro, brown)
• Landscape fabric anchor staples
• Scissors
• Pavestone Anchor Windsor Stone, 35 (a few extra to be safe)
• Leveling sand (for Pavestone brand at Home Depot, it has “Step 2” on the bag), two .5 cu ft bags
• Large plastic container for sand
• Dust pan
• 4” putty knife
• Enriched tree soil (the kind that has fertilizer, manure, etc), one 1.5 cu ft bag
• Mulch, cedar (natural color), two 2.0 cu ft bags
It’s important to note that with round shapes, and particularly a circle, it’s very difficult to have all courses contain full blocks because the diameter of each course is smaller than the previous course. Be prepared to cut down some blocks using the chisel and drilling hammer. If you have to cut a block, make the cut 1/4 in shorter. For example, if you want the block to be 8 in wide, cut it at 7 3/4 in. The reason for this is that by using the chisel, you won't get a clean cut, so if you had cut the block at 8 in, there will be parts of the block protruding out past 8 in, which is why I recommend compensating for this by cutting 1/4 less. Even with that, the cut might still not be exactly right; this is just an inherent part of cutting with a chisel. If you really want a clean, accurate cut, you'll need to rent a special saw.
Instructions
1. From the center of the hole in the yardstick, measure out to 30 in and mark with colored tape for easy viewing.
2. In the area that you’ve selected to be the center of the tree ring, put a large nail through the hole of the yard stick and into the center of the proposed tree ring.
3. Move the yard stick around in a complete circle, marking every foot or so with a stake.
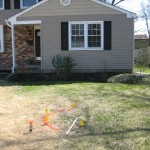
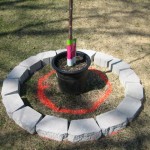
4. Paint a circle connecting all the stakes and wait 15 minutes before touching the painted areas with anything.
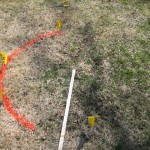
I didn't read about using a yardstick anywhere. I came up with this idea on-the-fly. Everything I read suggested using a string, which would be more work.
5. Do a dry run by laying out one course of blocks and verify measurements. You should be able to fit 16 blocks, so adjust as necessary to get 16 blocks in. IMPORTANT: If you make any adjustments to fit all 16 blocks, repaint or re-mark the area that needs to get dug out and be as precise as possible. If you’re off even by an inch in diameter, that can mean the difference between fitting all 16 blocks or only 15 ½ blocks. I made this mistake and had to cut a block in half for the first course since I was running out of daylight and wanted to get everything done because the weather reports were calling for rain the next day.
6. Dig the center out first (this is where the tree will go into), using the round point shovel, putting the native soil onto the plastic tarp. The hole should be as deep as the collar (top) of the root ball and twice as wide as the container diameter. Digging more than necessary is better since you can always fill with native soil to adjust the height later.
7. From the top of the hole to the edge of the ring, dig to a depth of 4 in (this allows for 1 in of native soil, 1 in of sand (+/- as necessary) and burying the first course approx 2 in). If the area is sloped, you’ll need to adjust how deep you dig out certain areas. If the area is relatively level, just dig out 4 in all around.
- a. Before you dig out the area, use the half-moon edger to score the outer perimeter of the ring and then score lines inside the ring (like cutting into a pie).
- b. Use the square head shovel and dig/pry the areas that you just scored. Continue removing more native soil until you have a depth of 4 in, trying to keep everything relatively level in the process.
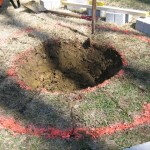
The half-moon edger is a great tool. It was the single most versatile and useful tool on this project.
8. Tamp down the 4 in deep ledge that you just dug out.
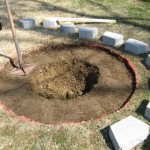
I got compliments about the circle from my wife and neighbor. I guess my yardstick technique worked pretty well.
9. Use the piece of 2 x 4 and a level to check for levelness at different areas. Put more native soil down and tamp as necessary until the ledge is level all around.
10. Do a dry run again. Don’t skip this step because what you marked and what you actually dug out can vary by a few inches, which can mean the difference between fitting a full block or having to cut a block.
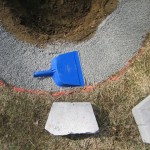
11. Put down 1 in deep x 10 in wide of leveling sand around the outer diameter of the ledge. Tamp and check for levelness, with the 2 x 4 and level, and adjust as necessary by removing or adding more sand.
12. Lay down the first course. Tamp blocks with mallet and adjust with sand to level (use the putty knife to adjust the sand). It helps to wiggle the blocks into the sand to get them to level out. Use the 2 x 4 and level to check for levelness.
13. Walk around on top of each block, putting your entire weight on each block as you walk around, and wiggling your body to set the blocks in place.
14. Remove tree from container, tapping sides of container with rubber mallet to loosen.
15. Adjust tree height so that the root collar will be level with the ground (don’t level it against the first course!). Add native soil if necessary (that’s why you dug deeper—it’s easier to add the native soil back in than to have to dig a deeper hole at this stage). If you had to add native soil back, tamp the bottom of the hole.
16. Center, level, and plumb the tree.
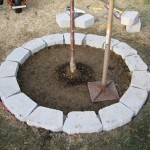
17. On the tarp, dump the bag of tree soil onto the native soil and then mix them together. Fill the mixture around the root ball, breaking up clumps and any air pockets (use the half-moon edger for this, but be careful not to damage the roots), to get the mixture to settle. Use the bow rake for breaking up clumps and for leveling out the area.
18. Once you’ve completely filled the area around the root ball and it’s level with the surrounding soil, gently tamp everything down.
19. Lay landscape weed block fabric over soil and halfway over first course (trim if necessary). This will allow the second course to sit on top of the fabric edges and hold them in place.
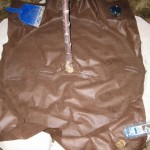
The fabric color matched the mulch. Make sure you use this to keep weeds at bay. It's not expensive and adds just a few minutes to the project.
20. Pin down the fabric, with the staples, in specific areas to keep it from shifting.
21. Lay down the second course, making sure to center the blocks against the joints of the first course.
22. Water the area inside tree ring to give it a good soaking.
23. Add the mulch, but keep it a few inches away from the base of the tree.
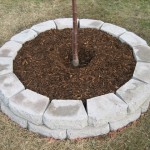
The dark spots on the blocks are just water spots that'll dry out. Note how the mulch isn't piled up against the base of the tree.
24. Water mulch to give it a good soaking.
25. If you have any soil left on the tarp, you can just drag it to another area of your yard (having dumped the soil on the tarp from the beginning makes this easy).

