Caulking, Notes and Tips
2011-01-19 Initial Post
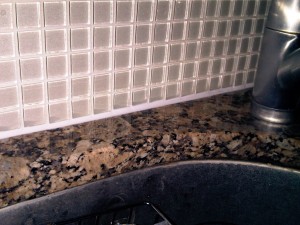
I had the day off from work the other day and caulked my kitchen backsplash (7/8 in glass tiles) and some other areas around the house. I went to Home Depot to get some white caulk and decided on DAP Alex Plus caulk since I've used it before and it's easier to clean up than silicone. The backsplash area doesn't get hit with a lot of water, so I didn't need something specifically for kitchen and bath. The reason I want to caulk the backsplash is because the grout started to settle and crack (the backsplash was installed almost two years ago). I asked one of the Home Depot workers if I should get the DAP Pro Caulk Tool Kit (the one seen on TV) and he said that I could just use a wet finger. I took his advice and decided not to get the kit because my wife had bought another caulking tool a while ago and I figured I could use that if a wet finger didn't work as well.
I think the Home Depot guy was wrong. For someone who's not a professional, probably any caulking tool is better than a wet finger. I can't believe he didn't tell me to buy it considering that the kit cost less than $10. Right after working my first few feet of caulk with a wet finger I was very discouraged--it looked terrible. I grabbed the caulking tool that my wife had bought and, wow, what a difference! Not only does the caulk bead look nicer, but the tool removes a lot of the caulk residue on either side of the bead--basically like a squeegee, which a finger cannot do. A finger might be able to make a nice bead, but it won't be able to easily remove the caulk residue.
If you're going to use clear caulk, note that there are types that have a matte finish. Some areas don't look good with the shiny and wet look from standard silicone, so ask for the matte finish.
Before I started, I had done a quick search for some caulking tips and the first one I found that was useful was How to Apply Caulk Properly. Here are some additions things I'd like to mention:
- I used a utility scissor to cut the caulk tube nozzle.
- I used Clorox Disinfecting Wipes to clean the areas to be caulked. I let that dry for about an hour, which was longer than necessary. I also used a vacuum to clean up any loose grout.
- Have a lot of paper towels handy! I like the paper towel rolls that allow you to tear off small sections, which is much more convenient than having to use a whole sheet.
- Use a very, very small amount of caulk on the first section until you get a feel for how much to put down. I had cut a 1/8 in hole in the nozzle, which was the smallest marking and ended up putting too much caulk on the first section. After some more sections, I got the hang of how much to squeeze out and how quickly to move the caulk gun. You can always go back and put down more caulk, so there's no need to pile it on the first time.
- Get into a wide, stable, stance and stretch your arms out to start the bead and move in a smooth motion to the end of the section. You don't want to stop to adjust your footing because that'll break your "flow" and add more time to cleaning up the bead.
- Dip the beading tool into a little bit of water before each run.
- Make sure the beading tool not only works the bead, but also squeegees the caulk residue on either side.
- There might be some areas, such as the end, where the beading tool might not work too well on, so use a wet finger in those areas.
- Use small pieces of moist paper towel to clean off any remaining caulk residue.
- Make one last run over the bead with a wet finger--do this very lightly. This will smooth over everything. You want to do this very lightly so that there's barely any caulk on your finger after each run.
- You can put on a second "coat" after the specified drying period (2 hours for the caulk I used). Use a much smaller amount than the first run and work the bead the same way, using a tool first and then your finger.
Here's a picture of the backsplash one day after:

Here's the caulk I used:
Here's the beading tool that I used (I don't have this exact brand, but it looks identical):
Here's the DAP Pro Caulk Kit that I was thinking of getting:
I think the beading tool I have might be more comfortable to use since it has a handle, but I won't know for sure until I get a chance to compare by using the DAP Pro Caulk Kit.
