Bathroom Remodeling Notes
2012-07-05 Initial Post
We got our main bathroom remodeled in January 2012 and I finally got around to finishing up my notes about that.
CONTRACTOR INFO
The contractor we ended up using, Tony, was referred to us a few years ago by another contractor, Ed. Ed had done some really good work for us at very reasonable costs. One job that Ed did was to break through a wall and put a door in from our dining room into the adjacent garage. Ed only charged us $790 and used a Therma-Tru brand door along with custom-building steps for the short drop from the dinning room into the garage. Another contractor (Joe) quoted us $2,000 to do the same thing!
A few years ago we had asked Ed about putting in a tile backsplash in our kitchen and he referred us to Tony. We had Tony give us an estimate and he seemed like a decent guy. We didn't use Tony for that job but ended using him for this bathroom remodel. We thought that since Ed referred us to Tony, Tony's work must be top notch.
Tony was actually our first choice but he never got back to us initially so we contacted other contractors. We were 99% ready to commit to Joe but ran into issues with final negotiations. Joe does not know how to run a business--he gave up a $4,500 job with us because he didn't want to throw in painting of a 5 ft x 9 ft bathroom (most of the walls would be tiled so there wouldn't be much painting needed). We didn't haggle with Joe for anything else, so I don't know why he blew this deal. After the deal with Joe fell through, I attempted to contact Tony again and he followed up this time. He came over and gave us an estimate which was actually the lowest out of the four estimates we got. We thought that this would be like the job Ed did with the door (lowest estimate but excellent work and materials).
To make a long story short, Tony talked about doing top notch work but his grouting, which we thought would be his strong point, was terrible. He tooted his own horn a lot, but his work did not back it up. He would always say how detailed and anal he was but his work didn't show that.
I think the behind the scenes things like putting in moisture and mildew resistant drywall on the walls and cement board on the floor was done well, but all the trim and finishing work (the stuff we actually see on the surface) are not Tony's strong points. I honestly wonder if he needs reading glasses to see the details that he's missing because even after he "fixes" things, they still don't look good. If his vision is fine, then his standards of quality are much lower than ours. I know we aren't being picky because my mother-in-law's house has tile work in the tub surround that is over 10 years old and the grout lines are still perfect and have not cracked at all, so I know what good tile work looks like.
He was easy to work with and did redo areas that we asked him to redo, but what he re-did still wasn't up to the quality he always talked about. And towards the end we just wanted him to finish up and leave because he was taking too long and it wasn't worth the wait for the mediocre quality of work. He even made comments (really complaints) about how the bathtub walls weren't plumb/square so he had to spend a lot of time cutting tiles and it was very "tedious." He also made the excuse that since we used subway tiles in a staggered pattern, it made the grouting more difficult. We were very disappointed with Tony at the end. He's an older man, so we figured that he had a lot of experience and issues like those wouldn't bother him and should have been expected.
From what I've deduced from talking to Tony, I think Ed and Tony met each other at a home inspection course and I guess Tony was always talking about how great his work was and Ed believed him and referred him to us. Since we respected Ed's work, we figured that any referral from Ed was golden. Ed had referred us to a decent electrician before, so that's why we didn't even question Tony's ability. So the lesson here is even with referrals, you should check the work first-hand if possible.
I think some of this also had to do with the tiles and fixtures we used since they weren't as common and perhaps Tony hadn't work with them as much. But regardless, you'd figure that someone with his experience could easily adapt.
GENERAL INFO / KWIKSET ELECTRONIC DEADBOLT REVIEW
Try to see the items you're getting in person and take measurements. This is particular important for shower fixtures. We saw a Grohe shower set at a local store and ordered it online for much less. The problem was that we didn't take any measurements of the setup in the store. And because showers come in different shapes and sizes, there's no standard spacing for the fixtures.
We ended up spending at least an hour trying to figure out how far to space everything. And our contractor ended up misunderstanding our measurements and had to reposition the shower handle, which required cutting the existing pipes and tile and redoing them. I strongly suggest drawing everything out on graph paper in as much details as possible. Unless you will be home the entire time the contractor is there, it's better to have everything in writing/drawing.
To make it easier for the contractor and to ease my wife's security concern, she bought a Kwikset 909 L03 SMT CP electronic combination deadbolt. I was reluctant to put it in but now that we have it, it's so convenient and works well. Afterwards I also looked at a similar product from Schlage and I'm glad we got the Kwikset instead. Even though the install should be very similar for both, the instructions from Schlage are much longer and more complicated and overwhelming.
With this deadbolt, we were able to program one of the codes for the contractor so we didn't need to give him a key. We also have a remote fob for our home security system, so I gave that to him also. So when the contractor is done, I can easily change the deadbolt code.
I'll give a brief review of the Kwikset here:
- + Very simple instructions.
- + Solid construction and good finish. Yes, the interior cover is plastic, but the exterior parts are all solid metal, so that's the important thing.
- + Has an auto lock feature which will lock the deadbolt after 30 seconds. This is nice because sometimes I have to double-check to see if I locked the deadbolt. One time I drove back home to verify if I had locked our old manual deadbolt. I actually stopped using this because if I was unloading a lot of items from my car, the door would lock. It'd be nice if the auto lock could be delayed up to 5 minutes.
- + An alarm sounds after an invalid code is entered (I think it's) 3 times.
- - You can only program two codes and each code can have four to eight digits. It would be nice to have more than two codes and to have longer codes like a ten-digit code (this would be useful since a phone number with area code is ten digits).
STONE - MARBLE INFO
We needed a marble top for a vanity and found a stone fabricator who had a nice 1 1/4" white carrara marble remnant. Here are some things I learned from the sales person:
- The businesses that sell the big slabs of marble, granite, and other natural stones are known as "stone yards" and some of them don't cut (fabricate) the stones.
- A fabricator will cut the stones. Some yards will also do fabrication, but it looks like a dedicated fabricator usually does a better job.
- A fabricator will get large slabs for its clients and then cut them down. If there are any pieces left over and the client doesn't want them or doesn't claim them in X days, the remnant becomes the fabricator's property. So in that case, the fabricator actually has a "free" piece of stone. That's what our remnant was--it was a leftover from another client's job. So the fabricator charged us a very reasonable price for the stone and fabrication for our vanity top.
- A good fabricator will reinforce the underside of the stone with rods of steel. This is especially important for something like a vanity top that will have to support a sink. See here for info on rodding: http://www.woodweb.com/knowledge_base/Preventing_Marble_Tops_from_Cracking.html.
- A good fabricator will wait until the vanity (in our case) is installed and then come out and take the measurements to create a template and then come back after the pieces are cut to install the stone. This ensures that the pieces will fit the vanity and walls very closely. Because of this, you need to carefully coordinate with your contractor so that he can get the vanity ready to be templated. Also, after the template is made, it could take a week for the fabricator to cut the piece and then come back to install it. The wait could hold up your contractor from being able to finish installing the vanity fixtures and other work.
Based on info from http://www.johnbridge.com/vbulletin/archive/index.php/t-9332.html, I concluded that polished marble doesn't need sealing. It doesn't hurt, but is not necessary. Sealing of the grout is what's important and sealing the marble itself in the process is fine.
My contractor used and recommends Miracle Sealants 511 impregnator sealer and applied it with a white rag.
CHAIR RAIL INFO
We got marble chair rails and ended up having them installed a little too high on the wall. The top of the chair rail is 45" from the floor. The problem with the height is that it interferes with the spacing of the bottom of the medicine cabinet. In retrospect, we should have gone one to two whole tiles lower (approx 3" - 6" lower).
But one issue with installing the chair rail too low is that it might be too close to the faucet and handle, which will make that area too busy. You should lay everything out and decide how high to put the chair rail. For ease of installation, the height should be based on whole tiles, otherwise more tiles will need to be cut, adding time to the job.
The spacing of the chair rails is something we didn't think about. We had them spaced approx 1/8" to match the spacing of the wall tile. The problem with spacing them that far apart is that you need to build the grout up and by doing that it doesn't look as nice. Tony said that normally chair rails are butted up against each other.
TILE INFO
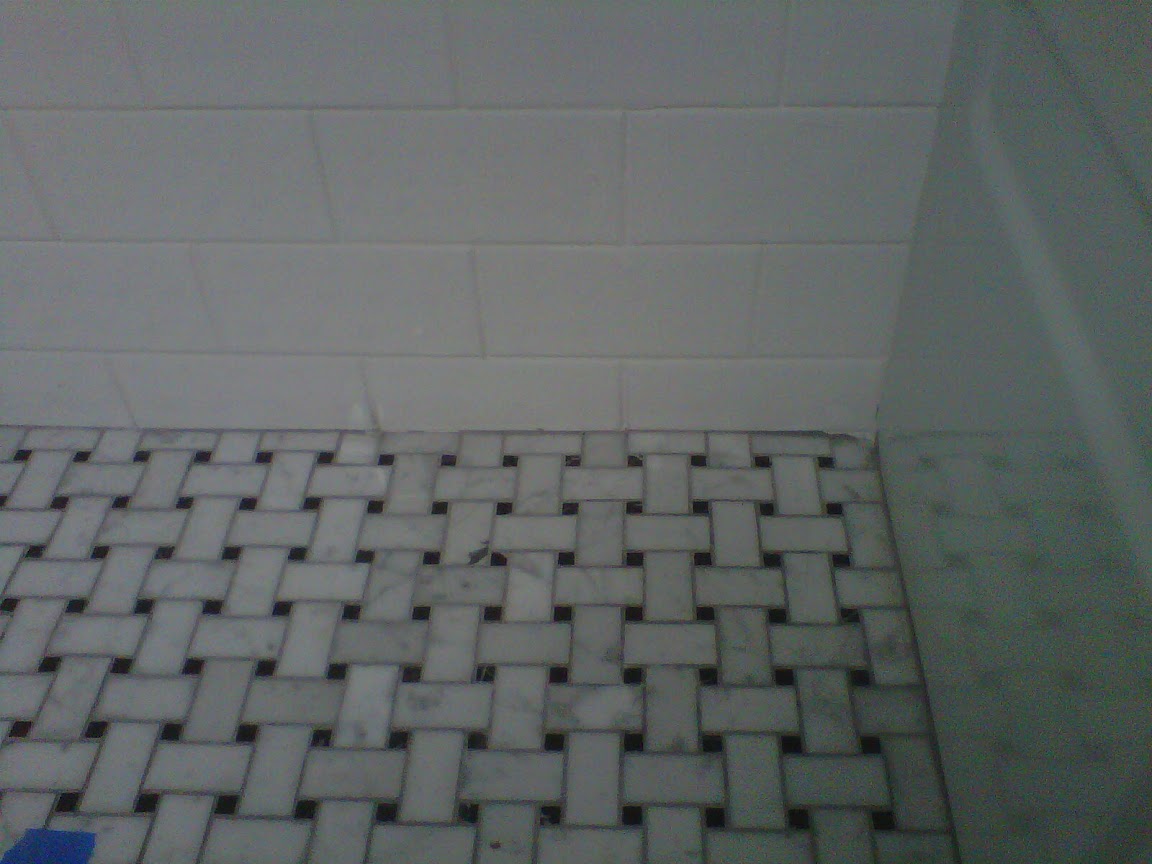
On the floor we used a marble mosaic basket weave design that had little square dots. What a pain those dots were. They easily break off from the backing and can shift when setting on the adhesive or when grouting. We had several dots that had one of their corners sticking up, which could hurt someone's toes, so we had the contractor reset them. In retrospect, I would NOT get tile with small little pieces in them.
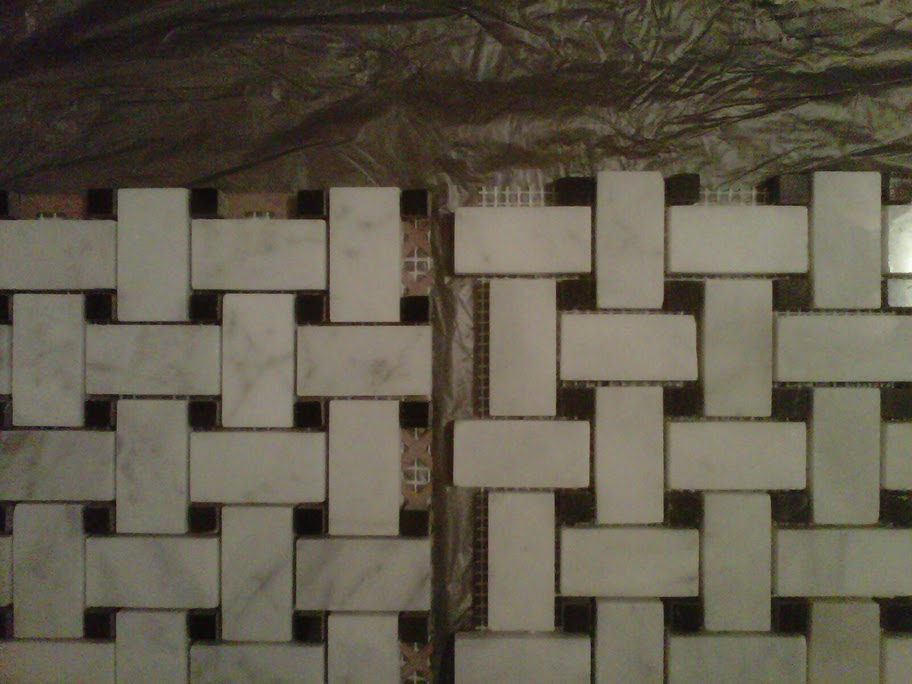
We originally got the marble tiles and marble chair rails from Lowes since they were cheap. But then my wife decided to order samples of both from Oracle Stone and Tile and we saw how much better Oracle's quality was, especially with the tiles. From the picture below, you can see how much more more exact the cuts of marble are and the extra backing on the tile from Oracle. The price was about the same since Oracle had free shipping. The quality of their products is on par with that of a local tile store in our area.
TILE GROUT INFO
We're using ceramic tile on the walls and marble on the floor. I've seen other home owners install tile themselves and it never looks good because their grouting doesn't look clean like a pro could do. I don't doubt that I could do a good job myself, but I'd need a lot of practice first, and it's not feasible to get that type of experience unless I did tiling for a living. Unfortunately, our contractor wasn't that good at grouting either!
Based on info from http://floorelf.com/using-the-correct-type-of-grout:
- Unsanded grout is easier to work with since it sticks better (because there's no sand in it).
- Sanded grout is usually used for grout lines 1/8” and wider, but it depends on the tile material. If the tile is polished marble, the sand will scratch the marble, so you should use unsanded grout even if the grout line is wider than 1/8".
- Less shrinkage with sanded grout, which is why it's recommended for wider grout lines—shrinkage is more noticeable in areas with more grout.
- Epoxy grout is better, but hardens quickly, so you don't have as much time to work with it, and it’s expensive.
Based on info from http://www.johnbridge.com/articles/floors/tile-floors/: Pre-mixed grout isn't real grout. Not recommended.
Based on info from http://www.acehardware.com/product/index.jsp?productId=3214755#showReviews: Simplegrout Pre-Mixed Grout sets up very quick so it's not really usable.
Based on info from http://www.contractortalk.com/f73/grout-boost-whatcha-think-94965/: Grout Boost brand of grout additive makes working with unsanded grout harder and it still stains anyway.
Our contractor's technique for grouting is to first rub the grout on by hand and then use a float to work it in.
SOAP DISH AND SHELVES INFO
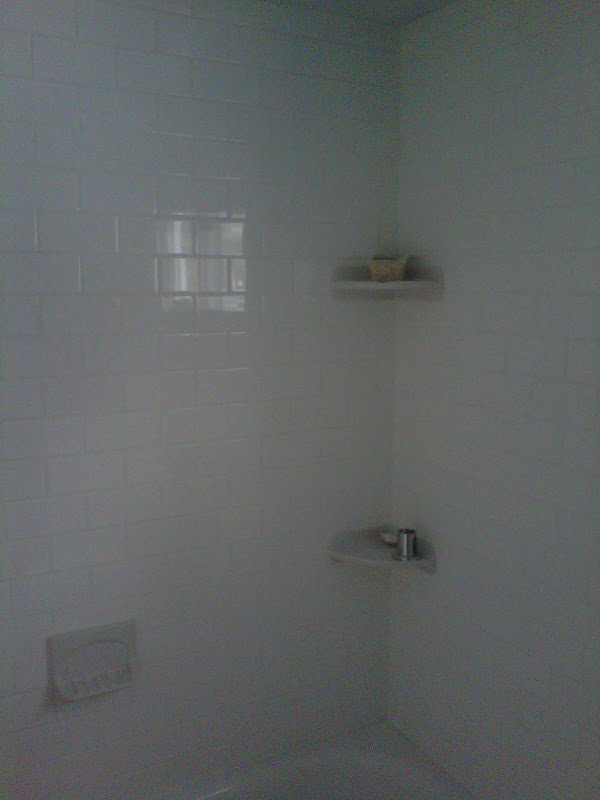
We considered getting marble shelves but ended up getting a soap dish and two corner shelves from Home Depot, both in porcelain. We decided on porcelain since it's much more durable than marble and we'd be able to use the same cleaning chemicals on it that we would for the porcelain tiles in the bathtub area. The quality of these pieces were surprisingly very good for something at Home Depot, but they weren't cheap either.
BATHROOM EXHAUST FAN INFO
It's common to vent the fan out through the roof soffit--even the instructions from NuTone suggests that. While I was doing some research on this topic, I read http://www.askthebuilder.com/665_Bathroom_Exhaust_Fans.shtml and the author advises to vent through the roof. I spoke to two contractors about this and they don't like the idea of cutting a hole in the roof, and neither do I.
On a related note, when I had asked a roofer about installing an attic exhaust fan, he said he couldn't guarantee against leaks unless he had also installed the roof. So if a roofer is telling me that, then I don't want a general contractor to be cutting holes in my roof. The NuTone fan we got is very powerful and is rated for a much larger space than our bathroom, so I'm thinking it can push the air out far enough from the soffit that it can't easily come back in. Tony ended up venting it out through one of the gable vents since the area around the soffit was too tight to work in.
VANITY AND SINK INFO
We bought a display model vanity for around $200 since it was very difficult to find a decent white vanity with legs. The store we got it from was a high-end kitchen and bath store. We also bought a rectangular sink from the same store. The fabricator got ready to cut the marble top and realized that the sink wouldn't fit into the vanity (with the marble top). So Rich, the kitchen and bath salesman, ordered a different model rectangular sink which still didn't fit. In the end, we had to get an oval shaped sink.
We were extremely disappointed with Rich. How does someone who deals with kitchen and bath stuff all day not know that a particular sink wouldn't fit a particular vanity. And worse off, the second sink he ordered still didn't fit. We didn't want to hold up this project any longer so that's why we got the oval sink.
FIXTURES INFO
When shopping for shower fixtures, make a note of how they are spaced in the showroom, e.g., how high is the spout from the top of the tub. We ended up buying our shower fixtures online, so we didn't have a physical reference that we could actually look at.
Another bit of advice is if you can, keep the fixtures the same style. So if you have separate hot and cold handles, get a new faucet that also has separate hot and cold handles and not one that has one single handle. It'd be extra work to cut the pipes to reconfigure them for another style of faucet handle(s). Also, for the shower, the one wall would need to have extra hole(s) cut in it (if you're re-drywalling the tub area this wouldn't matter). The less work the contractor does, the less mistakes and issues. If you do a major redesign, expect it to obviously cost more time and money.
PICTURES
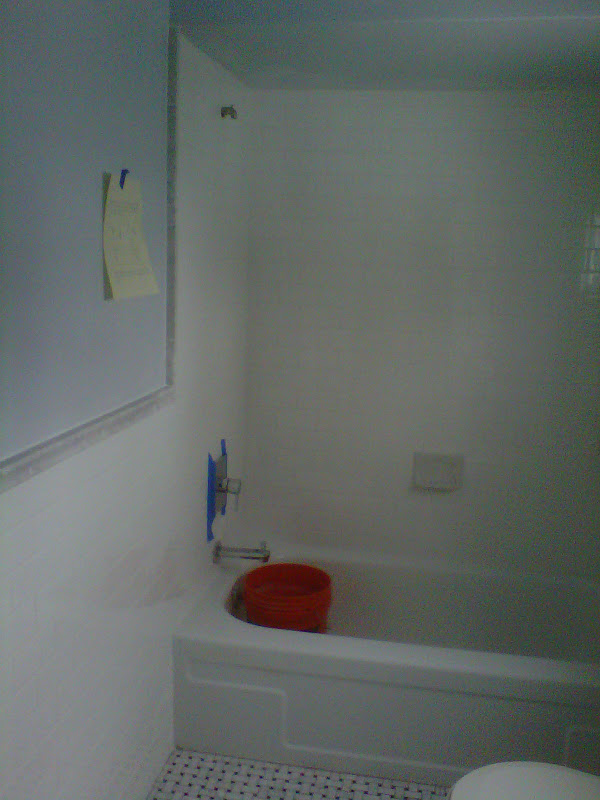
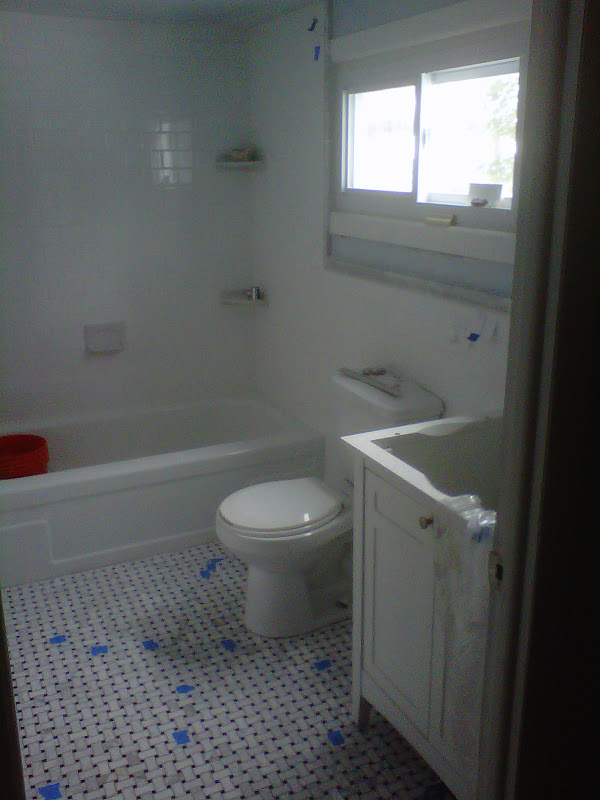
Here are some pics once the major work was completed. I took the pics with a Motorola Xoom tablet so the quality isn't good enough to see the bad grout lines.
